Adding customers in QuickBooks is an essential step for managing your accounts receivable and tracking sales. It’s critical to maintain organization and customer tracking as your business expands. You can include customer profiles in transactions or invoices by adding them to QuickBooks Online. Here’s how to update your customer list and add new clients.
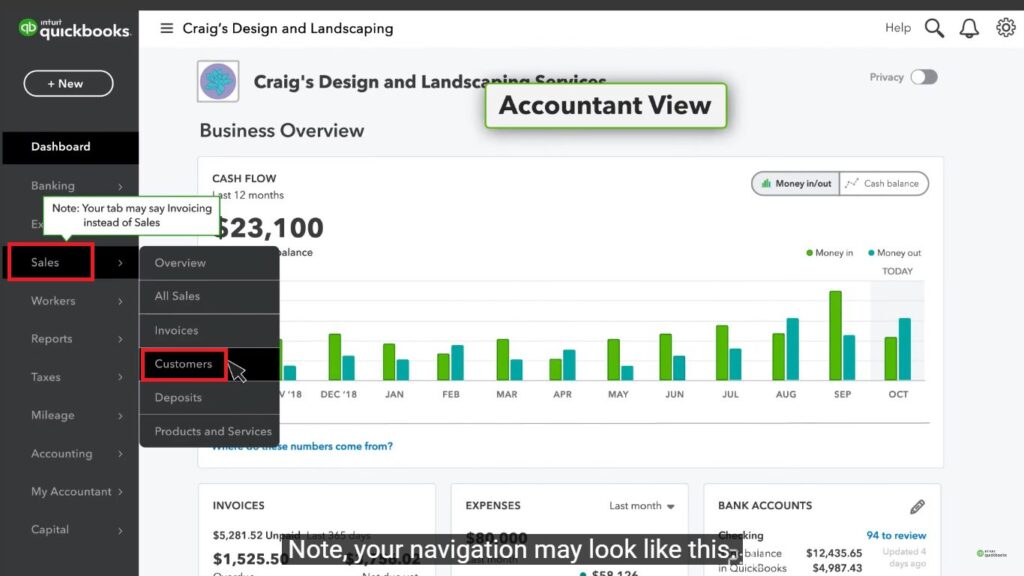
Step 1: Go to Sales, and click Customers
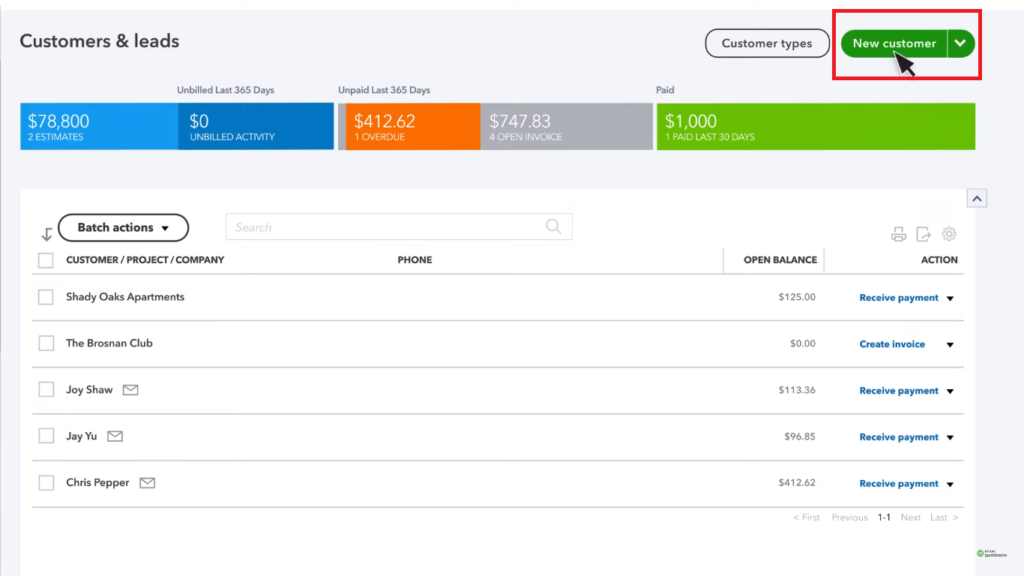
Step 2: Select New Customer
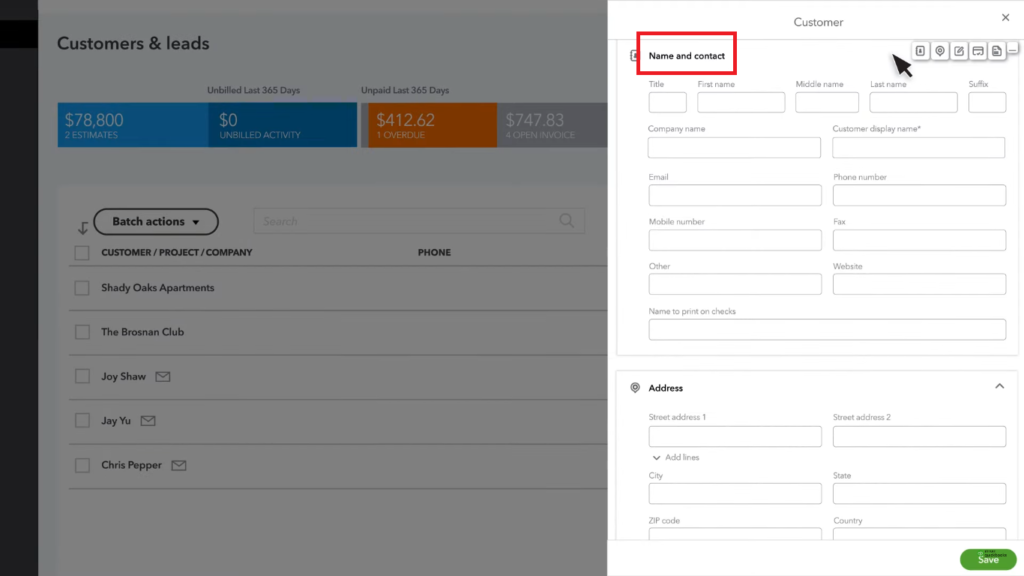
Step 3: Enter Customer Name. If you need you can enter their contact details, address, notes & payment details etc. and click Save.
If the customer is exempt from paying taxes, select the “This customer is tax exempt” checkbox in the “Additional info” section. Next, choose their tax exemption reason from the dropdown menu under “Reason for exemption.
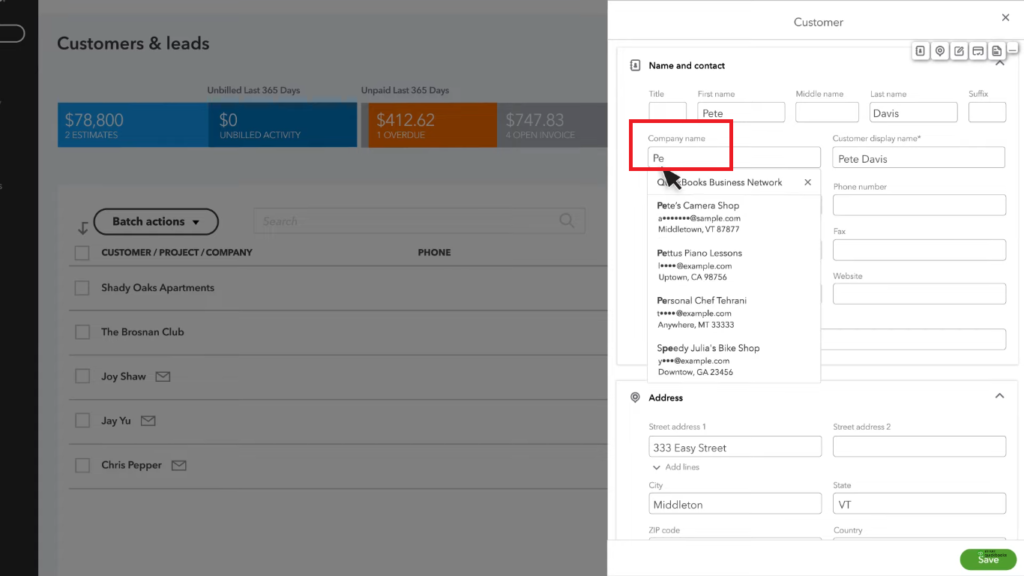
Step 4: If your customer is a company or business, you may be able to add them through the QuickBooks Business Network. When you type their name in the “Company Name” field, you can see their name popup. Select from the list and choose “Save & Send” to send them an invitation to connect. Then you will be able to view their business email, phone number and email address.
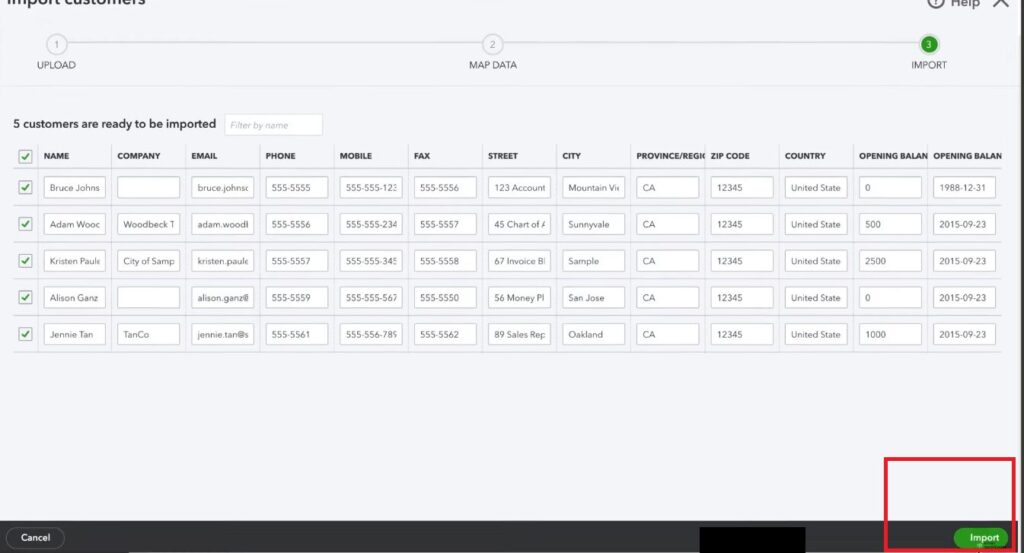
How to Bulk Import the Customers?
If you need to add several customers at once, you can bulk import their info from a spreadsheet.
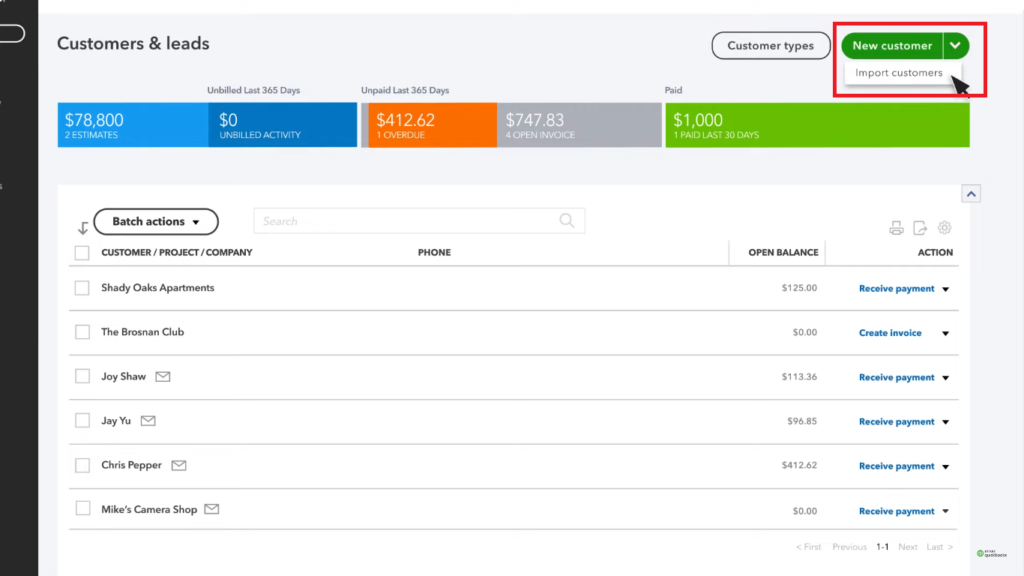
Step 1: Go to the customer list, Select Import Customers
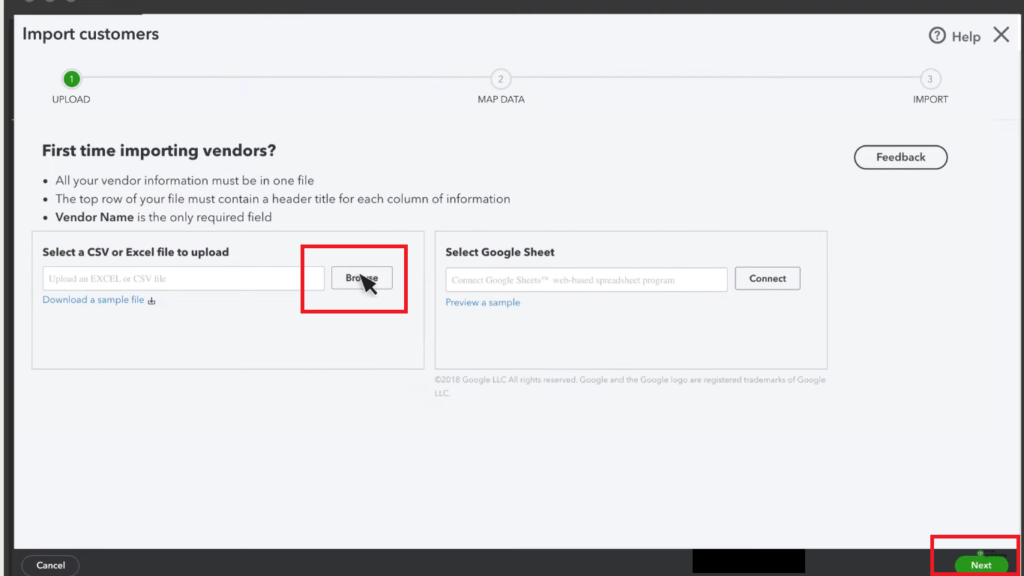
Step 2: Attach the spreadsheet, and select Next.
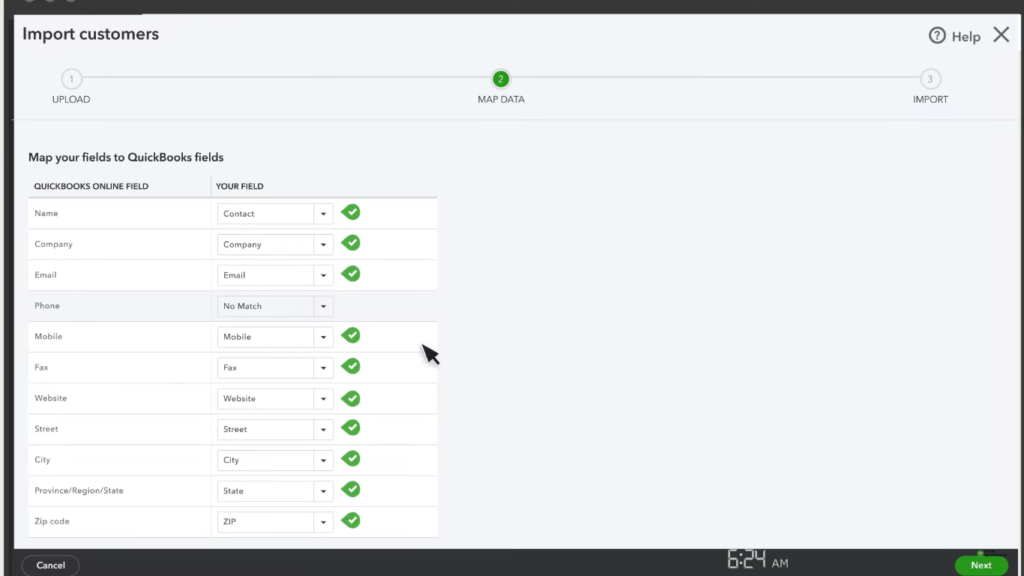
Step 3: Map the fields in your spreadsheet with the fields in QuickBooks and click Save.